Databases
Now that we’ve shown we can route traffic properly, it’s time to set up and connect to a database, the core of any full-stack app.
Docker Compose Setup
For this example, we’ll use Postgres, since it’s open source, widely supported, popular, and relatively lightweight compared to other options.
To get started, I like creating an external named volume to persist the database data. I do this because it helps avoid confusion since Docker Compose tends to prefix object names, which can get messy when working with multiple Compose projects or when switching to Docker Swarm.
docker volume create postgres-data
Next, let’s grab part of the docker-compose.yml file from Postgres’ official Docker Hub documentation1, then run docker compose up -d in the same directory to spin up the services:
services:
  db:
    image: postgres
    restart: always
    shm_size: 128mb
    environment:
      POSTGRES_DB: postgres
      POSTGRES_USER: postgres
      POSTGRES_PASSWORD: postgres
    volumes:
      - postgres_data:/var/lib/postgresql/data

  adminer:
    image: adminer
    restart: always
    ports:
      - 8080:8080

volumes:
  postgres_data:
    external: true
Here’s what this does:
- It starts a
dbservice running the latestpostgresimage, with default values for the database name, user, and password - It also starts an
adminerservice on port 8080, giving us a handy web-based GUI to manage the database
Notice that we aren’t exposing the db service directly to the host. For now, the only way to connect to and interact with it is through Adminer.
Exposing Adminer Through Cloudflare Tunnel
Now, we still can’t access the Adminer web UI from our domain. To fix this, we need to publish another application route that forwards traffic from a URL on our domain to the local Adminer service.
Head back to the Zero Trust Dashboard on Cloudflare, open the Tunnels section, and look for the tunnel running on our host. Click Edit, then go to the Published application routes tab to add a new route.
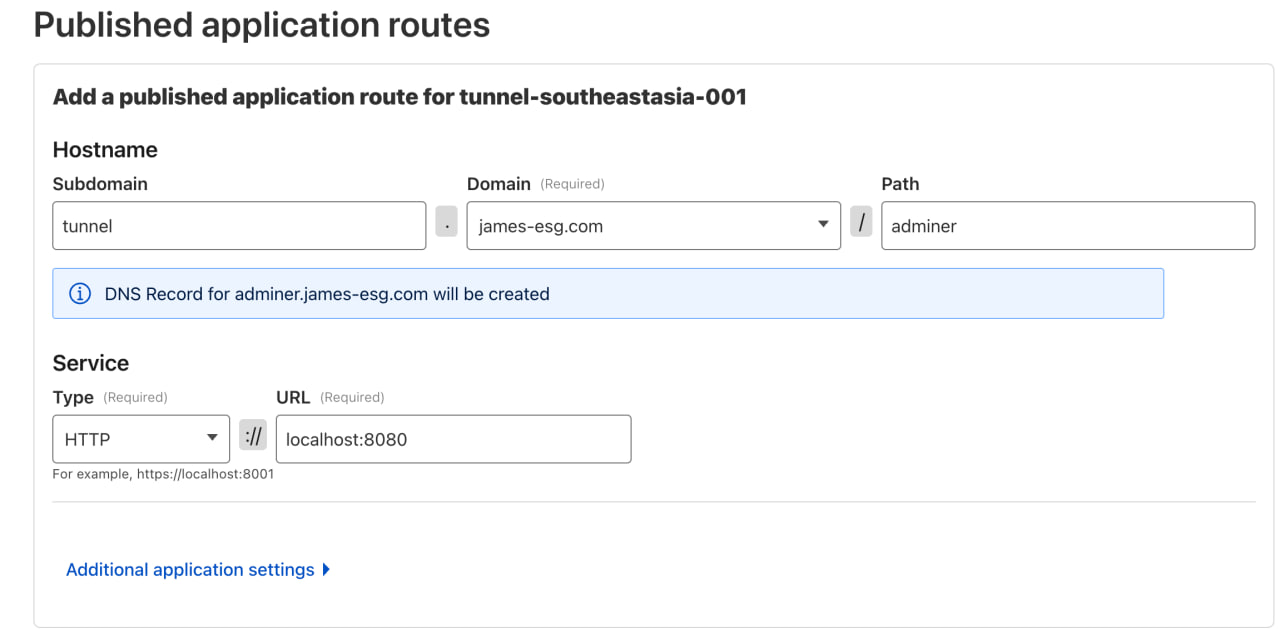
For this example, I’ll use tunnel as the subdomain again, select my domain, and set adminer as the path. (You can adjust this however you like for your setup.) Next, choose HTTP as the service type and set the port to 8080, since that’s where we exposed Adminer in the previous step. Once you’re done, click Save and wait a moment for the changes to apply.
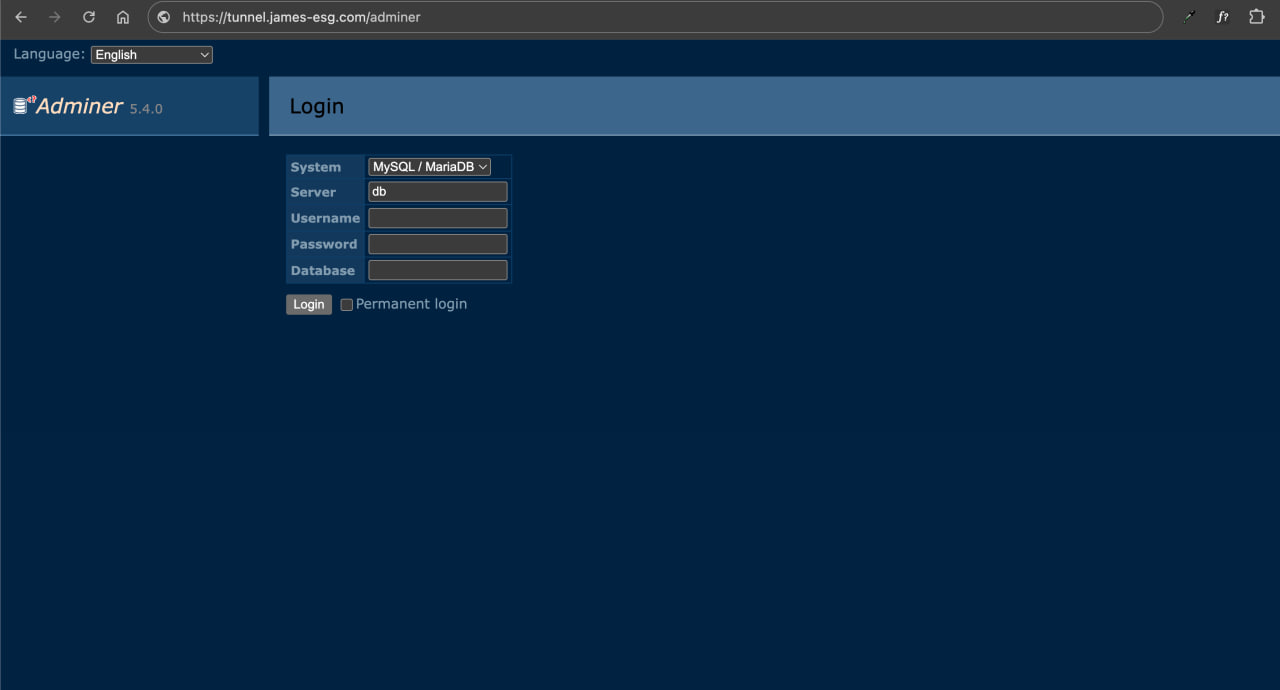
After saving, open the new URL in your browser, and you should see the Adminer login screen. To log in successfully, select PostgreSQL in the System dropdown, use db as the Server, and enter postgres as the Username, Password, and Database.
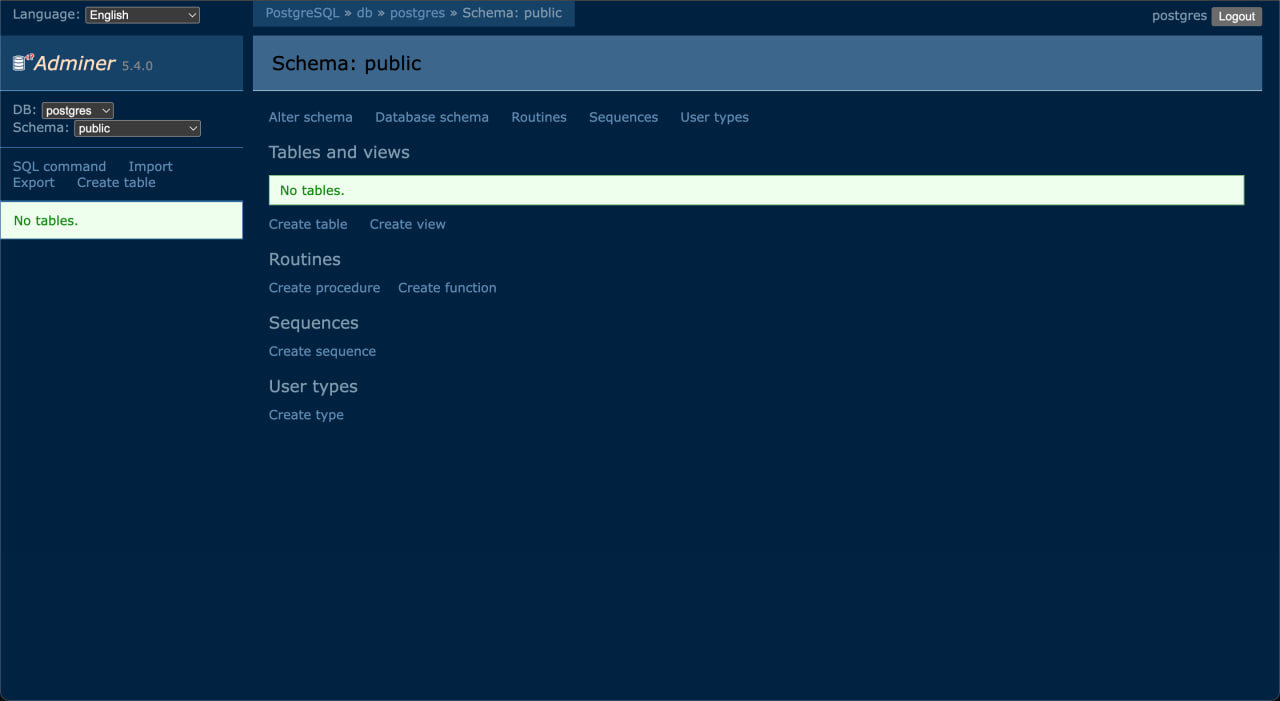
And that’s it, we’re in. Now we can create tables, run queries, and manage our database from the browser.
If you’re not a fan of Adminer and its quirks, don’t worry just yet. In the next section we’ll explore another option for managing your database.